

Kids can turn a normal month into a costly one fast, so learning how to set up sinking funds for kids’ expenses can help parents plan for these bills. A soccer fee can come up in the same month as new shoes and a birthday gift. Then school costs, camp fees, or a doctor visit can put another dent in the budget.
A sinking fund means saving small amounts for expenses you expect later. When a bill arrives, you already have money set aside for it.
Set Up Sinking Funds for Kids’ Expenses (Stop Getting Blindsided by Sports, Clothes, & Birthdays)
The Consumer Financial Protection Bureau advises families to set savings goals and break them into small steps. That idea can also help parents handle kid-related costs. If you want to learn how to set up sinking funds for kids’ expenses, this guide walks through the process from beginning to end.
You will learn which kid expenses deserve their own funds, how to work out a monthly savings amount, and where to store each fund. You will also see examples for sports, clothes, birthdays, school costs, summer activities, and medical bills.
What a Kids’ Sinking Fund Actually Is (And Why It’s Not an Emergency Fund)
How to set up sinking funds for kids’ expenses is a genuine question every parent should consider. A $400 sports fee or $200 school shopping trip can disrupt a monthly budget. These costs can seem unexpected, even when parents know they come each year.
A sinking fund means money set aside in small amounts for a known expense. An emergency fund handles real money problems, such as medical bills, job loss, or car repairs. The difference helps explain sinking fund vs emergency fund. One handles known costs, and the other handles unexpected money problems.
So, setting up sinking funds for kids’ expenses can begin with a monthly target.
$1,200 in yearly kids’ expenses ÷ 12 months = $100 per month
A small monthly amount can handle sports, clothes, birthdays, and school costs. This plan allows parents to budget for these bills each month.
Why a Regular Household Budget Keeps Failing You
A regular monthly budget may look fine until several kid expenses land in the same month. Fall sports may involve registration fees, gear, and travel costs. Then a birthday party may require a gift or party supplies. New shoes may also appear after a growth spurt.
When these costs pile up, the issue may not be poor money habits. The real issue may be a budget that has no set funds for known kid expenses. This is where sinking fund vs emergency fund for parents can help explain the difference.
These expenses also carry a mental load. A parent may check the bank account before a sports registration deadline. They may wonder if enough money remains for another expense. A sinking fund places each known cost in its own budget category. This way, these expenses do not compete with regular household bills.
7 Sinking Fund Categories Every Family with Kids Needs
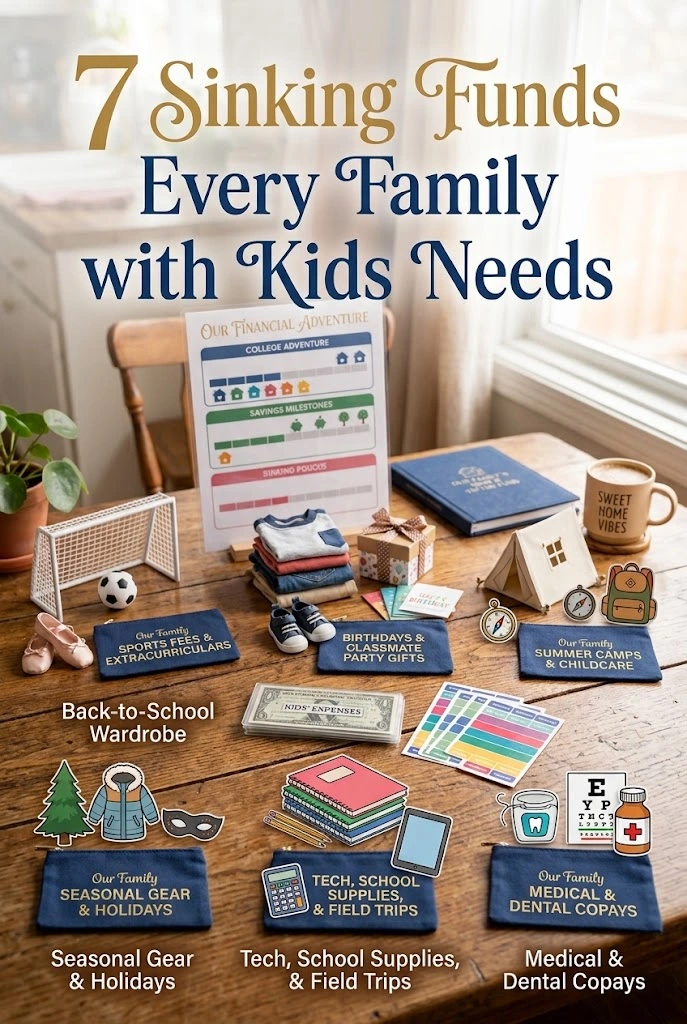
Kids’ expenses can catch parents off guard when several costs come up in one season. Sports, clothes, birthdays, school events, and activities can all require money. Sinking fund categories for families with kids can help spread those costs through the year.
You do not have to fund all seven categories at once. Choose three to five based on your family’s spending patterns. Then, place each category around a specific yearly expense. The following seven categories can help parents plan for these costs.
1. Sports Fees & Extracurriculars
Sports fees can take a huge share of a family budget in certain months. A sinking fund can help parents set money aside each month for these costs. Suppose one child has sports fees of $600 for the year. The monthly amount can be $600 ÷ 12 = $50.
This means you can place $50 into the fund each month. Families with two children can use the same math for each child. Multi-sport families can also calculate each sport themselves. This provides parents with the best way to budget for kids’ sports fees that may arise.
2. Back-to-School Wardrobe & Shoe Upgrades
School shopping can include shirts, pants, jackets, socks, shoes, and other clothing items. Suppose you spend $350 each year on these items. Divide $350 by 12, and the monthly amount comes to about $29. This shows how much to save monthly for back-to-school clothes.
You can save a little extra during spring and early summer. Most school shopping happens in July and August, so early saving can help reach the target. Kids can grow fast, so shoe sizes often change. Use our International Shoe & Clothing Size Converter to check US, UK, EU, and Asian sizes before you buy.
3. Birthdays & Classmate Party Gifts
Kids may get many birthday invites during the school year. A $20 gift and a $15 card might seem small, yet these costs may reach $350 by year-end. Suppose your family spends about $350 each year on gifts and party items. Divide that amount by 12, and set aside about $29 each month.
Some months may have many parties, so place a little more money into this fund during months with fewer parties. Parents can use the same idea to decide how much to save monthly for back-to-school clothes. Set aside some money for new shoe sizes too.
4. Summer Camps & Childcare Surges
Camp fees, babysitting, and day programs may raise family costs during these months. Suppose your family spends $800 on summer care. Divide $800 by 12, and that equals about $67 each month.
Make sure to set aside that amount each month in a summer fund. Then, when summer arrives, you have money saved for camp or childcare rather than one large May payment.
5. Seasonal Gear & Holidays
Parents may see several kid-related costs near the end of the year. Halloween costumes, winter coats, picture day clothes, and holiday gifts may arrive within a few months. A sinking fund helps spread these costs through the year.
Say your family spends $500 on these items each year. Divide $500 by 12 months, and the amount comes to about $42 each month. Put that amount into the fund each month. Around fall, you may have about $420 saved for these seasonal expenses.
6. Tech, School Supplies, & Field Trips
A supply list may include notebooks, folders, pencils, or art items. Moreover, a field trip may require a small fee. At times, a lost charger or broken calculator may also create an unplanned expense.
Suppose your family budgets $250 for these costs each year. In that case, divide $250 by 12 months to get about $21 each month. That way, you have money ready when school costs come up.
7. Medical & Dental Out-of-Pocket Copays
Medical and dental bills can pop up even when your family budget looks fine. Braces, eye exams, dental visits, and urgent care copays fit this category. These costs do not belong in an emergency fund since you may expect some of them each year.
Suppose you spend about $400 on these bills each year. Divide $400 by 12 months, and you get about $33 each month. Set aside that amount each month, and you have $400 available when these bills arise.
Cash Envelope Binders vs. Digital Banking Pots (Which One Actually Sticks?)
Cash envelope binders and digital banking pots use the same basic idea. They help save money for specific kid expenses. The main difference is where you store the money and how you use it.
A cash envelope binder uses physical cash. You place money into labeled sleeves for each expense. When you need to pay, you take cash from that category. This way, you can see how much money remains for each expense.
Parents can use the following cash envelope binder categories for kids’ expenses:
- Sports and Activities: team fees, uniforms, equipment, lessons, and club costs
- School Clothes and Shoes: school outfits, sneakers, coats, and seasonal clothes
- Birthdays: your child’s gifts and classmate gifts in two separate sleeves
- Camp and Summer: camp fees, summer classes, swimming costs, and outings
- Holidays and Seasonal: gifts, costumes, decorations, and seasonal events
- Medical Copays: doctor visits, dental visits, prescriptions, and small medical bills
On the other hand, digital banking pots use separate spaces inside your bank account. You can name each pot after a specific kid expense. For example, one pot can store sports money. Another can store birthday money. You can move money into each pot through automatic transfers.
Banks such as Ally and Capital One offer separate savings spaces. However, the biggest difference appears at the time of spending. A binder requires you to take cash from a physical sleeve. But a digital pot requires you to move money from the pot before spending.
So, think about your own spending habits. Choose cash if seeing physical money helps you control spending or select digital pots if automatic transfers suit you better. Both systems can help you prepare for kid expenses before they arise. The best choice is the one you can use month after month.
Shop Cash Envelope Binders on Amazon
Nefeeko A6 Budget Binder with Cash Envelopes
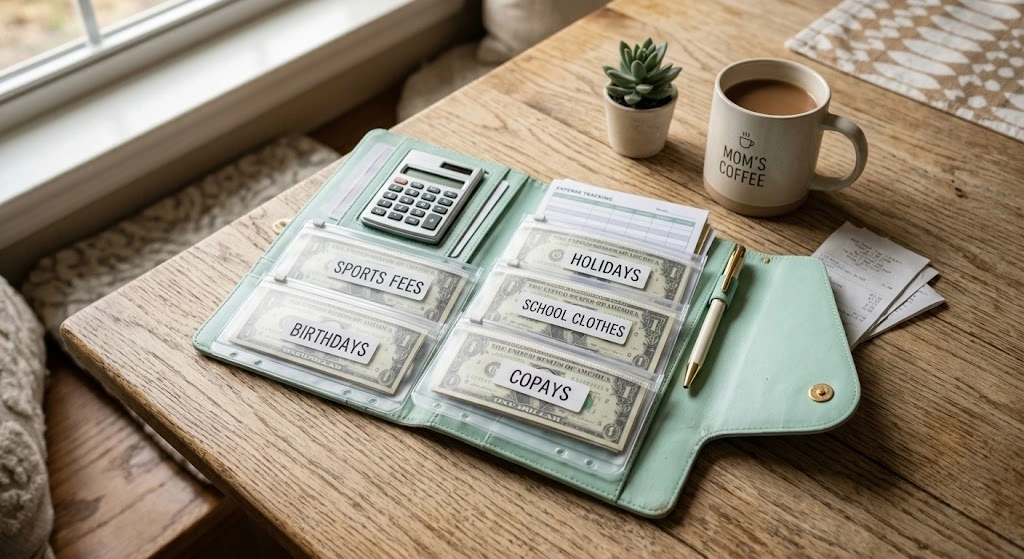
The Nefeeko A6 Budget Binder comes with 12 zippered envelopes for separate cash categories. You can label them for sports, clothes, birthdays, school costs, holidays, or other kid expenses.
The binder also includes monthly budget sheets, category stickers, and a small detachable calculator. Its A6 size gives you a compact place to store your cash, cards, and budget notes.
This binder suits parents who prefer a cash-based budget system. You can place a set amount in each envelope and check the balance before spending. It can also help you see which kid expenses have funds available and which ones need attention.
Shop the Nefeeko Budget Binder on Amazon ➡
ABC life Cash Envelope Budget System
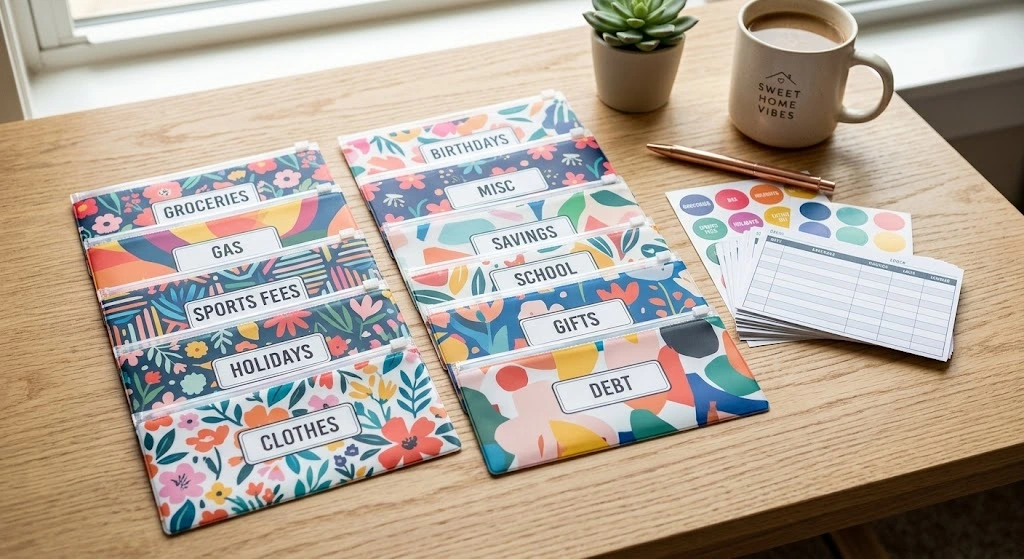
This ABC life set includes 12 colorful cash envelopes, so you can create separate categories for sports, birthdays, clothes, school costs, and other kid expenses. Each envelope has a snap-button closure and uses water-resistant polypropylene material. The 6.5 × 3.3-inch size fits cash, receipts, and small notes.
The set also includes 12 budget tracking sheets, 36 label stickers, and a clear storage pouch. You can write each expense category on a label and record deposits or spending on the sheets. This makes the binder-style cash method easier to organize in one place.
Cash Envelope Wallet with Budget Envelopes
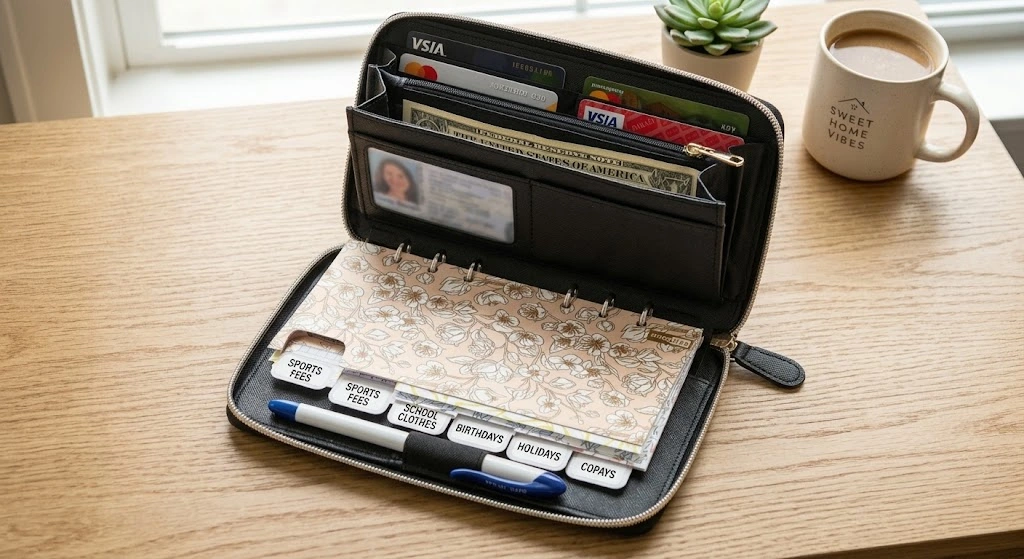
This cash envelope wallet can help parents separate money for different kid expenses. It comes with 12 tabbed envelopes, so you can label funds for sports, clothes, birthdays, camp, or holidays. The set also includes 12 monthly budget cards and one yearly budget planner sheet.
The wallet uses RFID blocking, which can help protect cards from unwanted scans. Its labeled envelopes also make it easier to see which funds are available for each expense.
The Math Blueprint — Calculating Your Monthly Number in 3 Steps
A sinking fund fits best when the amount matches the real cost of your child’s expenses. Use these three steps to turn yearly costs into a payday amount.
Step 1: Review 12 Months of Kid-Related Spending
Use bank and card statements from the past 12 months. Group costs into sports, clothes, birthdays, school events, and other kid expenses. Total each category to see the yearly amount. Then include a 10% buffer for price changes or an unplanned upgrade.
For example, say sports cost $1,040 per year. A 10% buffer makes that total $1,144. This number can become the yearly target for that fund.
Once you list your yearly kid expenses, use the Household Sinking Fund & Seasonal Expense Planner to work out the amount to save from each paycheck. Enter each expense, your pay schedule, and any money already saved. The planner then shows the amount to set aside for each goal.
Step 2: Divide the Yearly Cost by Your Pay Periods
Then turn the $1,144 yearly target into a payday amount. Divide $1,144 by 26 if you get paid every two weeks. That equals $44 per paycheck, rounded to the nearest dollar. Set aside $44 each payday, and 26 deposits total about $1,144 for the year.
Step 3: Set a Payday Transfer
Use a standing transfer or a separate savings sub-account. Schedule the deposit for each payday. This way you don’t have to remember each deposit manually. This method also shows how to set up sinking funds for kids’ expenses based on your income schedule.
You can use one fund per category or combine smaller costs into one kids’ fund. Either way, the goal is to turn yearly costs into small payday amounts.
Teaching Kids This System (Turning It Into a Money Skill, Not Just a Budget Tool)
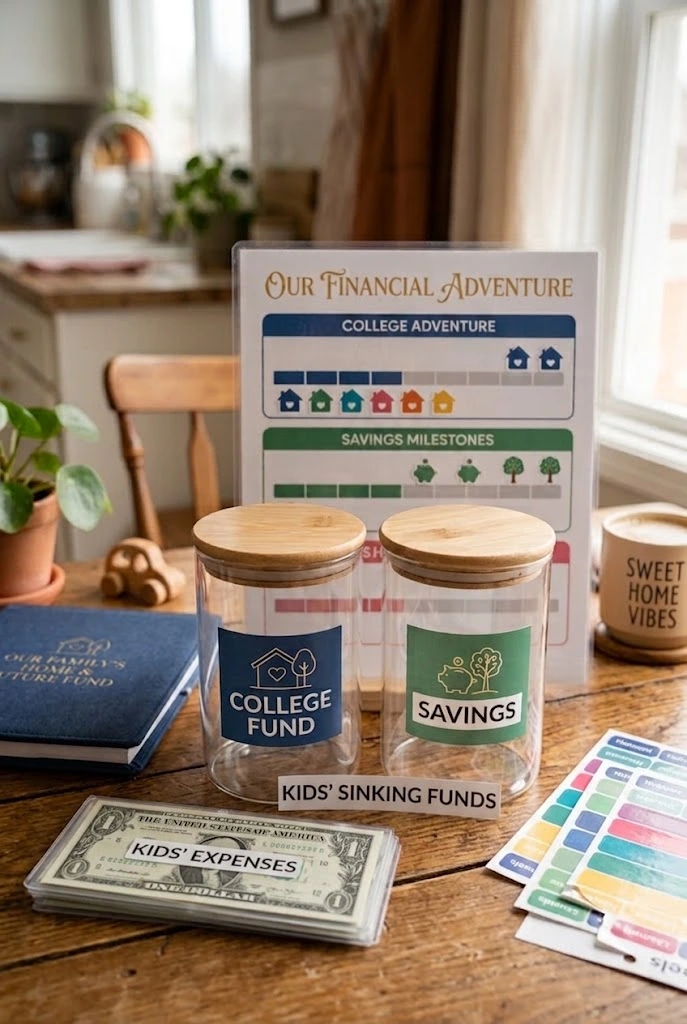
Once your family money system runs on its own, you can teach kids a smaller version. This can make saving a useful money skill.
A child can choose a $100 bike or game console. Set a target of $10 each week for 10 weeks. Each week, place $10 into a labeled jar or savings tracker. Your child can watch the amount grow until it reaches $100.
The process can teach patience and help your child think about purchases before asking for money. A paper tracker can also help younger kids see each deposit. Draw ten boxes and mark one box after each $10 deposit.
Later, your child can use this system for sports gear, a phone, or a special trip. This practice can make setting up sinking funds for kids’ expenses easier to understand.
Money-Saving Tools & Books for Kids on Amazon
MoonJar SAVE SPEND SHARE Money Bank for Kids
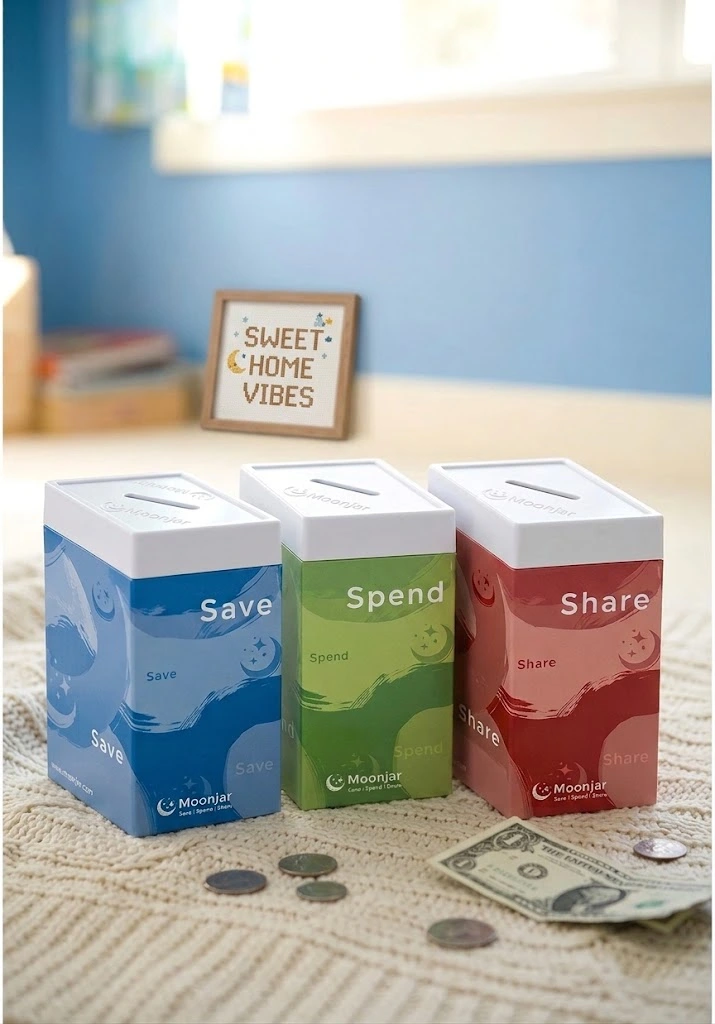
This MoonJar money bank gives kids three places for their money: Save, Spend, and Share. The three separate tin canisters show where each dollar goes. Color-coded lids also help them tell each section apart. The set includes a passbook, which can help parents talk about saving and spending with their child.
The diamond-shaped tins fit small hands and use a durable design. This set can be a good option for parents who want to teach money habits through a hands-on activity. It can also serve as a place for allowance, gift money, or a child’s savings goal.
Money Book for Kids: Investing for Kids

This book can help parents teach kids basic money skills through age-friendly lessons and examples. It covers saving, investing, stocks, bonds, risk, and reward. The book also uses activities and discussions that parents can do with their children.
It is written for kids ages 8 to 12, so it can suit families that want to introduce money topics early. Parents can use it to start talks about saving for goals, making money choices, and learning where money can go.
3 Mistakes That Break a Sinking Fund System Fast
A sinking fund can help parents prepare for kid expenses before bills arrive. A few small mistakes can leave a fund short when a payment comes due. Here are three mistakes parents should avoid when setting up sinking funds for kids’ expenses.
(1) Making Too Many Categories
Many sinking fund categories can make the system difficult to manage. A list of 15 to 20 tiny categories can make parents quit within a month. Whereas a smaller list of 3 to 5 categories is comparatively easier to manage each month.
Group similar costs under one category, such as “Kids’ Clothes” or “Sports.” Once the system fits into your monthly budget, you can create another category when a new expense comes up. This method can prevent a long list of funds that creates extra tasks but offers little value.
(2) Borrowing from It for Groceries
Borrowing from a sinking fund for groceries can make the whole system collapse quickly. A grocery shortfall can tempt parents to take money from a kids’ fund. So, keep a small grocery buffer in your regular food budget for price changes or an unexpected grocery purchase. This protects the sinking fund money for the expense you saved it for.
(3) Forgetting to Adjust as Your Kid Gets Older
Kids’ expenses can change as they grow older. A sports fund made around a 6-year-old’s fees may not cover expenses at age 12. So, check each category twice a year and update the amount when prices change. This can make the fund suit your child’s activities and expenses at each age.
Your Next 15 Minutes (Start Today)
Take 15 minutes today and write down your top three kid-expense pain points. Use sports, clothes, birthdays, school costs, gifts, or other costs from your budget. Then rank those three costs by priority. Setting up sinking funds for kids’ expenses can start with just one category.
Choose the highest-priority cost and set one automatic transfer today. Even a small amount can build a fund over the coming months. Then check that transfer in your bank account and note the amount. Once this habit suits your budget, choose another category to fund.
Frequently Asked Questions
What’s the difference between a sinking fund and an emergency fund?
A sinking fund covers a specific expense you expect, such as sports fees, school clothes, birthdays, or holiday gifts. Instead, an emergency fund covers unplanned costs, such as a car repair, medical bill, or sudden loss of income. So, use a sinking fund for known costs and an emergency fund for unexpected expenses.
How much should I save each month for my kid’s sports fees?
A good rule is to divide the expected yearly sports cost by 12. For example, if fees, gear, and travel total $600 a year, save $50 each month. Adjust the amount based on your child’s sport and future costs.
How much should I be saving for back-to-school shopping every month?
List your expected school costs, then divide that amount by the months before shopping time. For example, a $600 budget over six months means saving $100 each month. Adjust the amount according to your child’s school list and clothing costs.
Is a cash envelope system better than a savings app for family budgeting?
A cash envelope system is a suitable option if you prefer savings in cash and want to separate money for each expense. However, a savings app is suitable for families who prefer digital tracking and automatic transfers. Choose the option that fits your family budget habits.
How do I teach my child to save for something they want?
Teach your child to choose one goal and set a savings target. Help them put a small amount from gifts or allowance toward that goal. Use a jar, savings chart, or separate account to show their progress. Praise their effort and allow them to make small decisions about their money.